Literally in the lobby of the Hilton after the event, I registered for April 2024. I registered three robots, some part fueled by disappointment in Silent X’s early departure and another part fueled by uncertainty for NHRL’s new lottery system. Much to my surprise, all three were accepted. Now I had quite a challenge ahead; to prepare Silent X, Saiko!, and MegatRON for this event.
Silent X
The good part about its early exit from the tournament is that there was not much to do in terms of preparedness; the main focus would be addressing the torsion of the stator on its mount due to impact… and maybe trying to save the old motor.
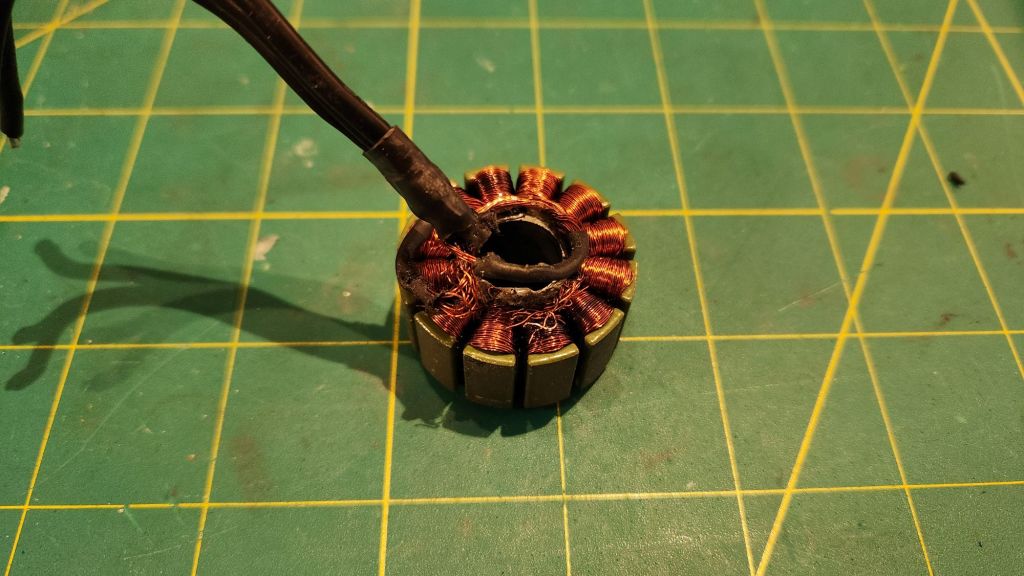
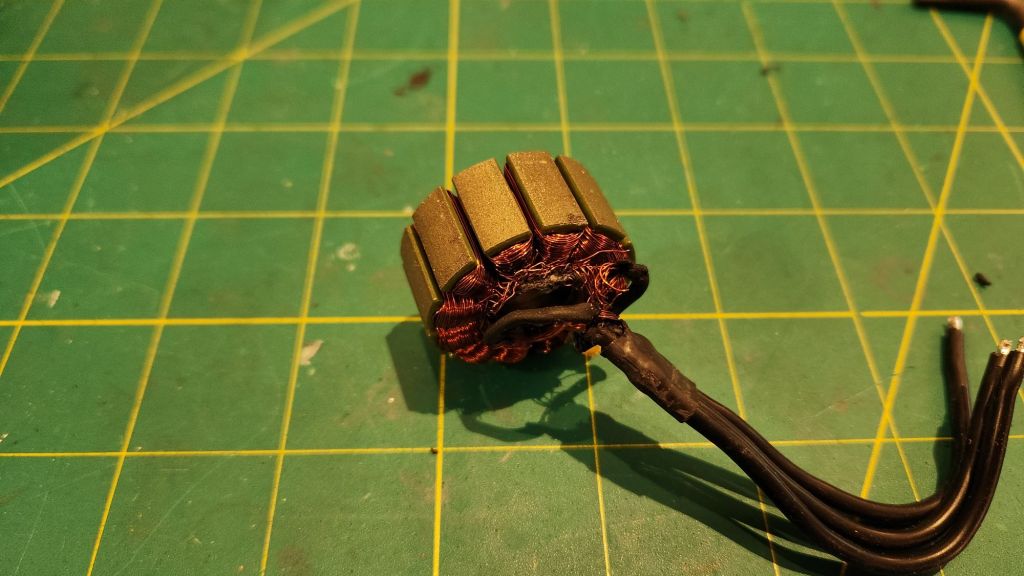
Yeah… nope. The twisting severed enough magnet wire to make the repair very difficult. Magnet wire is a solid core wire coated in a thin enamel that must be removed before you can solder or crimp to it. Without enough free length, you chance damaging the other winds or a poor connection scraping the enamel via mechanical means. I stripped this motor down with intentions of rewinding it later.
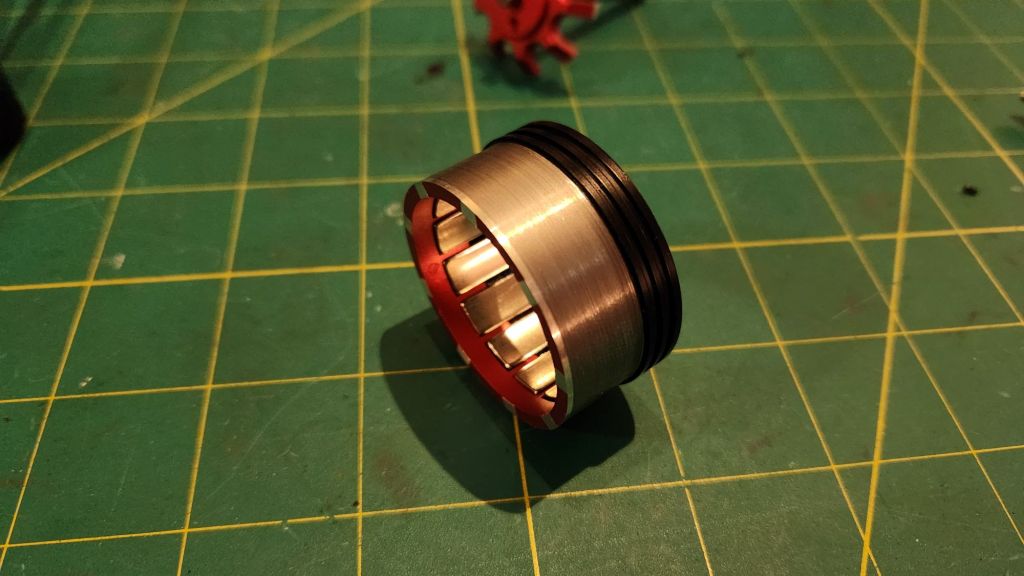
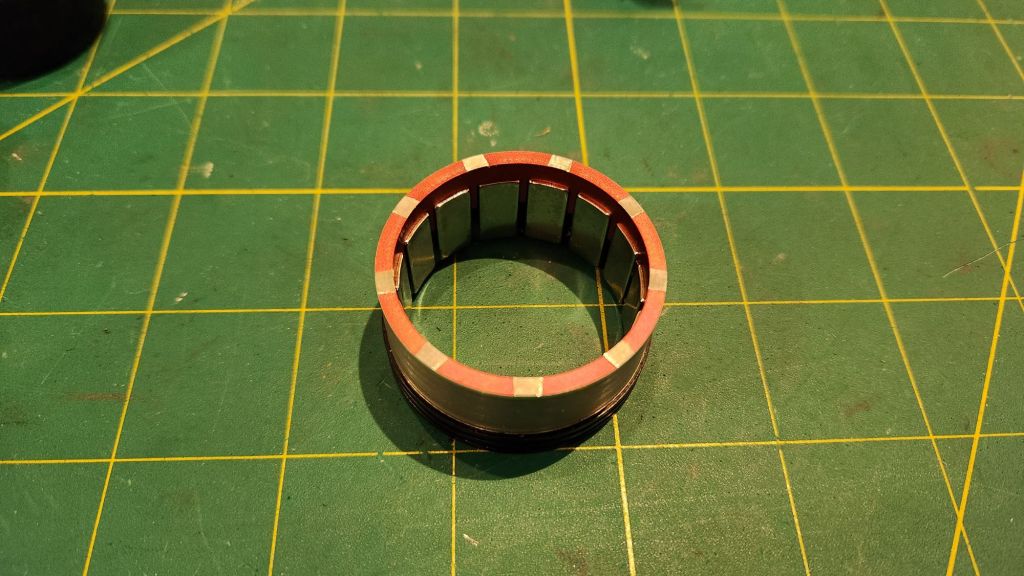
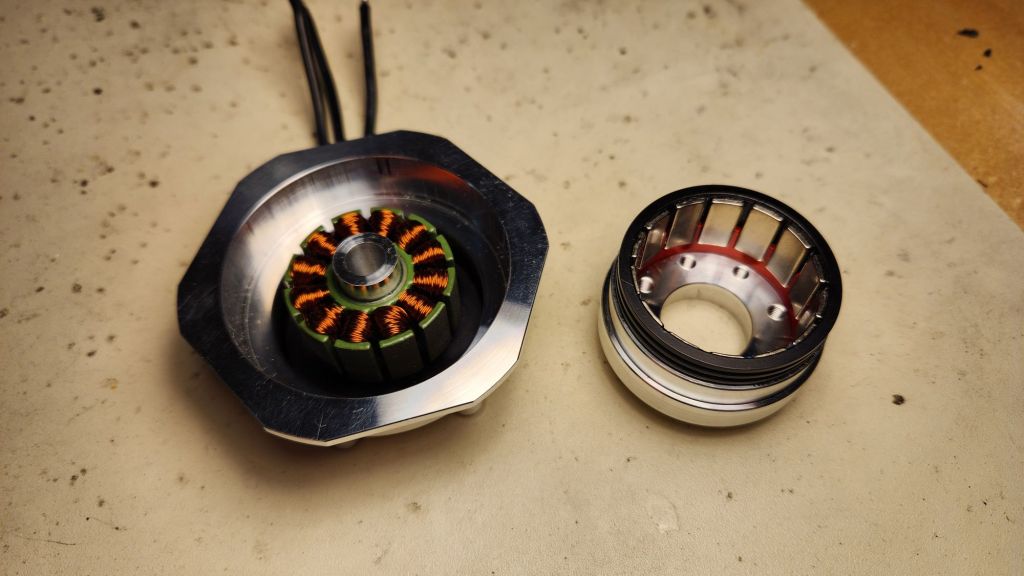
Instead, I purchased a new motor to dissect. This time I used the BadAss 3515-580kv motor which boasts much higher power ratings over the SunnySky XS3515-400. A few quick operations on the lathe and I had a flux ring and fully wound stator ready to go.
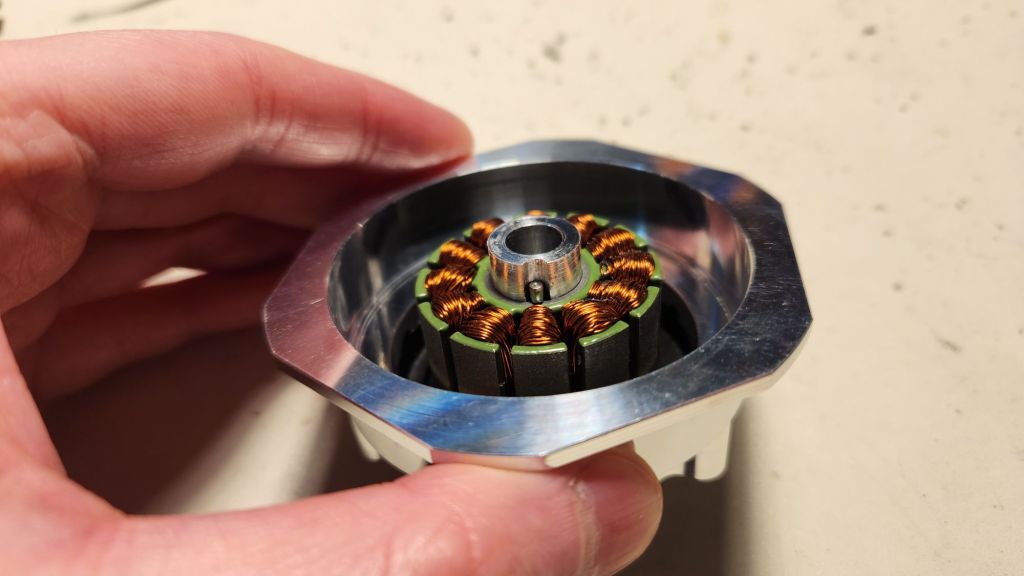
To retain the stator, I decided to utilize the pin notch that comes standard with most stators. Due to access and length requirements for tooling, I didn’t feel confident in making a properly sized slot so I carved one manually using a carbide burr. The slot radii was larger than that of the pin which makes it less effective as a torque-combatting device but should be effective as a secondary retainer if the adhesive fails to hold.

The downside is the motor was also heavier. So I used a carbide endmill to machine two holes in each AR500 blade.
Testing the combination yielded some amazing results. In addition to general “impact” testing, I also performed “wall push” and “wall stuck” tests where the bot essentially attempts to escape from static positions using weapon power alone. In particular, I did not anticipate the ability to somersault itself across the motor in the second test.
With those upgrades, the minimum viable readiness was established for Silent X! If I had time (spoiler alert, I didn’t) I would revisit the old stator and rewind it as a spare. On to the next!
Saiko!
A new Saiko! has been in the design phase the the early part of the year, implementing many lessons learned from the All-Stars event in last year December (link TBD). Now it was time to hit BUY and make it a reality.
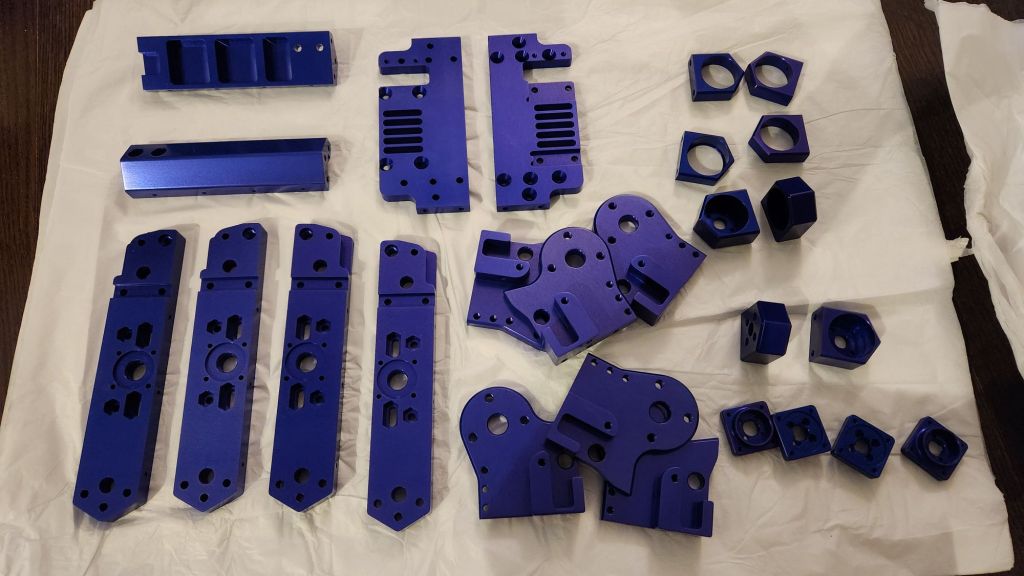

This new version would do away with the wrap-around formed AR500 armor because it was proven to be a massive liability and difficult to repair. Additionally, my change in job meant I no longer had access to welding and hot work. I am a big proponent of DFYMA aka design for your manufacturing capabilities.
Instead, I will be exploring thick TPU side guards. MegatRON already uses TPU side guards and has been demonstrated by many other robots in the same class. What would have been a challenge in technique and jigging is now an 3D modeling exercise. I designed them with the familiar curves and sweeps in addition to guards for the weapon shaft nut.
I found myself wishing for a high-density TPU as the armor would have had to be significantly thick to make up for the ~3lbs of steel which composed the outer armor. I found a few other places to allocate it like the weapon assembly and chassis.

I wanted to increase the width percentage of weapon to overall body so the beater was widened by ~1″ while the frame was narrowed by ~1″. The new beater is also semi-symmetric in that it has a symmetric profile with staggered teeth. This would provide me with the benefits of asymmetry while reducing the size of my counterweight (which was hit often). The frame was also elongated which made the wheelbase square and theoretically much more stable for straight driving.
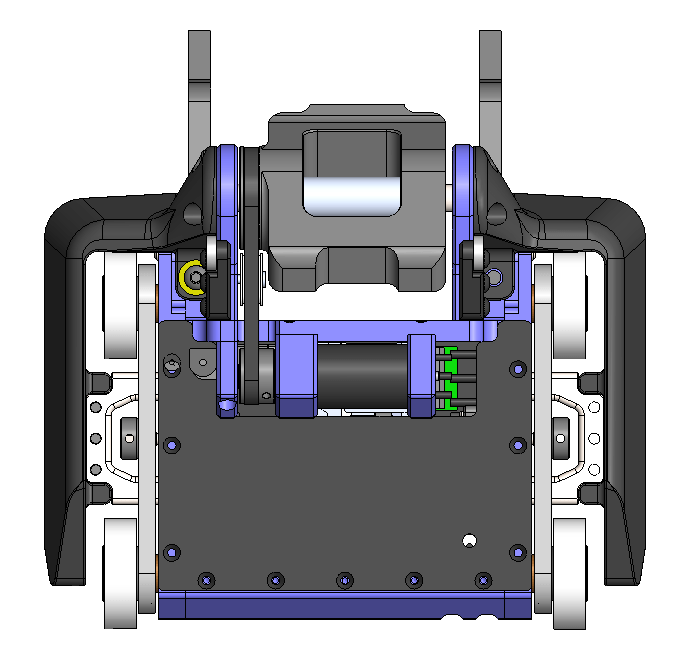
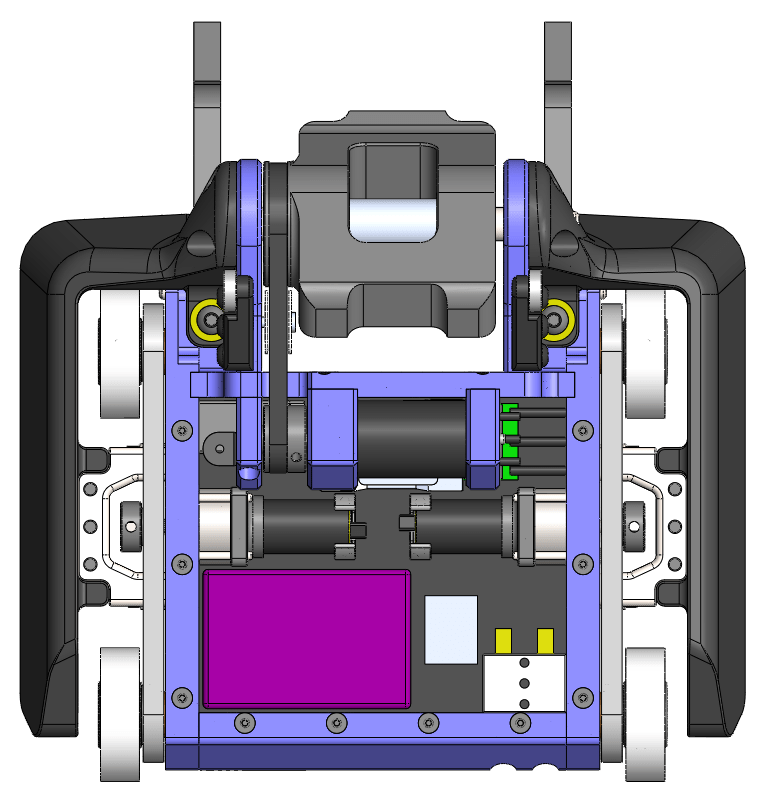
The new frame shape could no longer fit the old 2300mah packs so I looked into equivalent watt-hour packs in higher voltage which were more square form factor. The idea being that in the future I would replace the existing motors for lower kv ones that demanded less current and would make for an overall more efficient system. I ended up picking 6s 1550mah 130C packs from GNB which boasted an equivalent Wh to my 4s 2300mah GNB.
For the interim, I replaced the weapon’s hotter wind TP2940-8D for the mild 9D wind used in the previous Saiko! (this would end up being a mistake). During assembly of the gearboxes, it was also discovered that I did not actually have enough 5.2:1 output stages! To maintain consistency between the spare robots, I decided to load them with the 3.6:1 output stages which gave the robot a ~19:1 gearbox reduction instead of ~27:1. This meant slower acceleration times, more motor load, and potential challenges in startup. The latter being the more concerning since I depend on reliable response for driving maneuvers.

With both bots assembled and tested as much as time would allow, Saiko! version 2 was ready for its debut!
MegatRON
MegatRON had a much more ambitious list of changes I wanted to make but needed testing on critical subsystems before committing to an entirely new build. I decided to reduce the scope to development of a featherweight-class hammer saw hubmotor and treads via rubber-coated timing belts.
Why change after so many years of 2-wheel drive? It may come to a surprise to many of you but MegatRON is my worst driving robot, full stop. If I control it well or make it look easy well… its because I have gotten very good at handling the dynamics of this system. But the state of competition has risen enough that I felt the need to leverage every advantage I could get, and that means problem solving (which is fun!).
I still stand by the advantages of the 2WD architecture of hammer saw robots but it did come with remarkable disadvantages, the worst basically summarized as poor weight distribution. MegatRON attempts to maintain a stable connection with the floor by having three main points of contact: the middle fork and each drive wheel. The problem is the arm which comprises a non-trival mass of ~7.5 lbs and shifts between forward or behind the wheel axles. When the arm is forward the COM is stable but when the arm is backwards it teeters the edge of stability and makes it very squirrely on turns or even wheelie on accelerations. An immediate solution was to allow the arm to drag on the floor via the backrest and thus alleviating the see-saw phenomenon. However the tradeoff was reducing the effective weight of the robot over the wheels from 30 lbs to ~22.

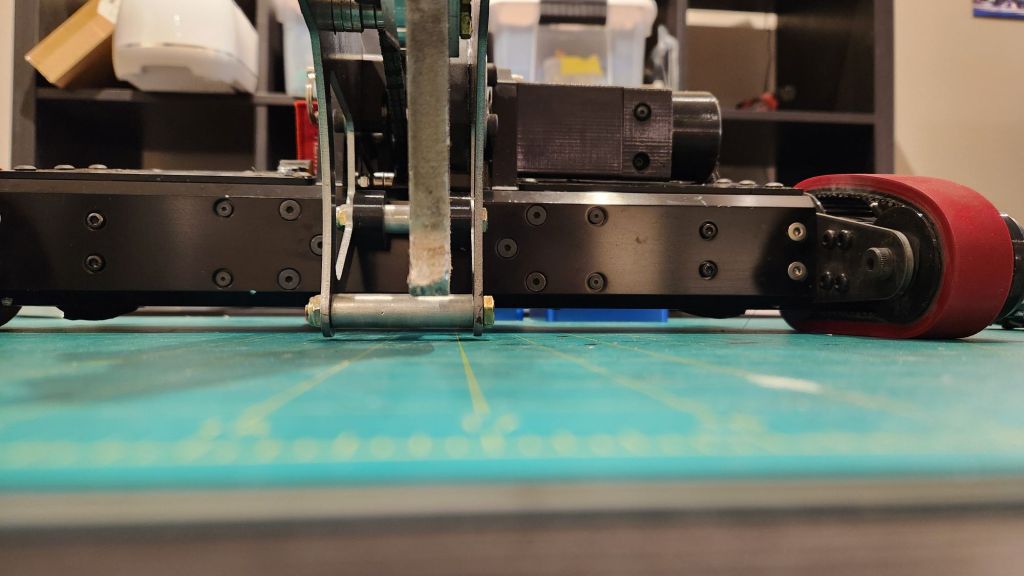


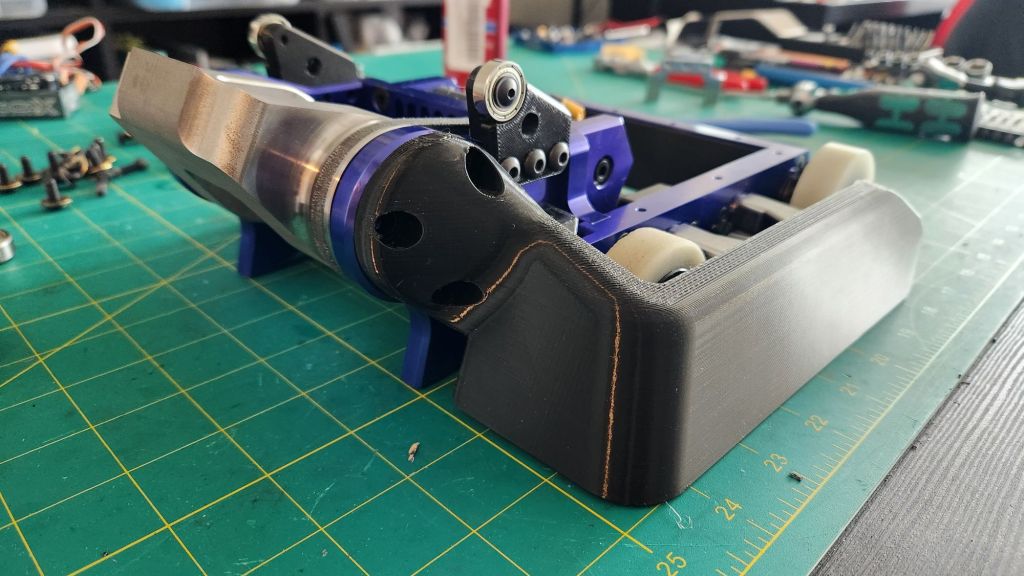
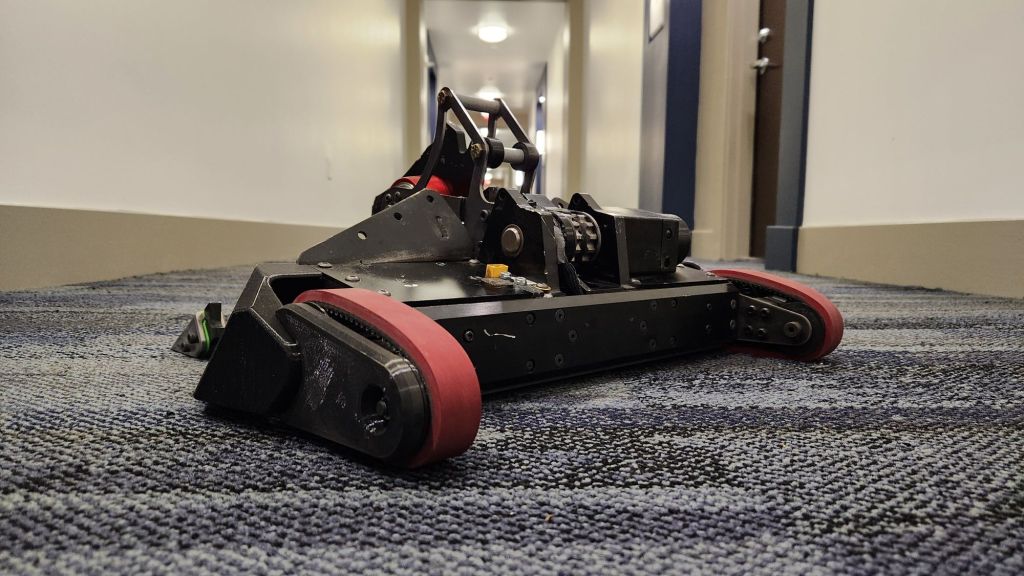
This is where the treads come in. Essentially acting drivable wheelie bars, they would extend the wheelbase backwards to support the weight of the arm when it was back. The arm could then be suspended from the floor and contribute its full weight to traction. An added bonus was the springy behavior of the treads. The belts were coated with rubber as a circle and thusly wanted to maintain that shape even when stretched between the span of two pulleys; they would bulge a bit on the straight lengths of belt. This turned the straight sections of the belt into free springs that increased the duration of contact with the floor.

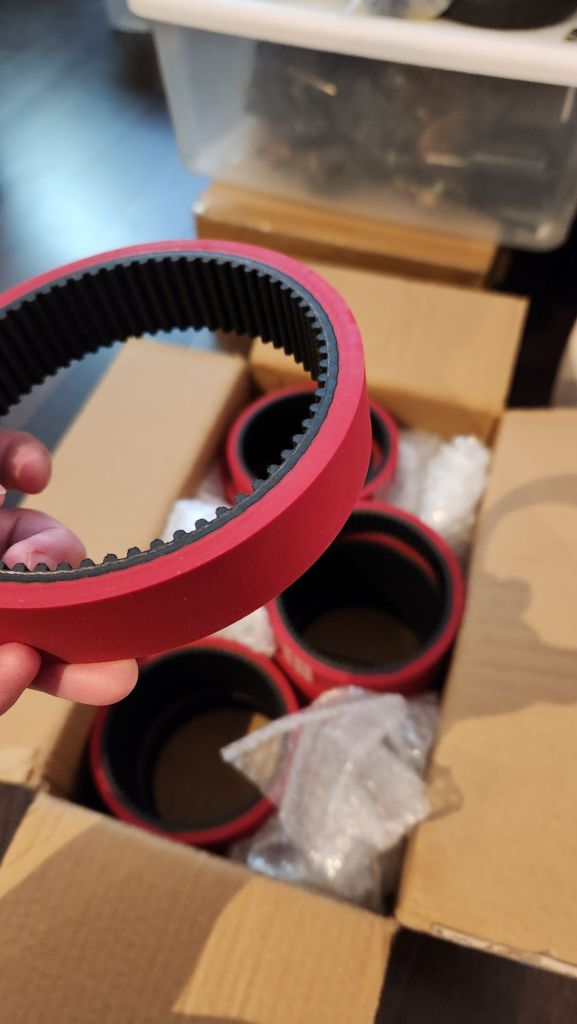
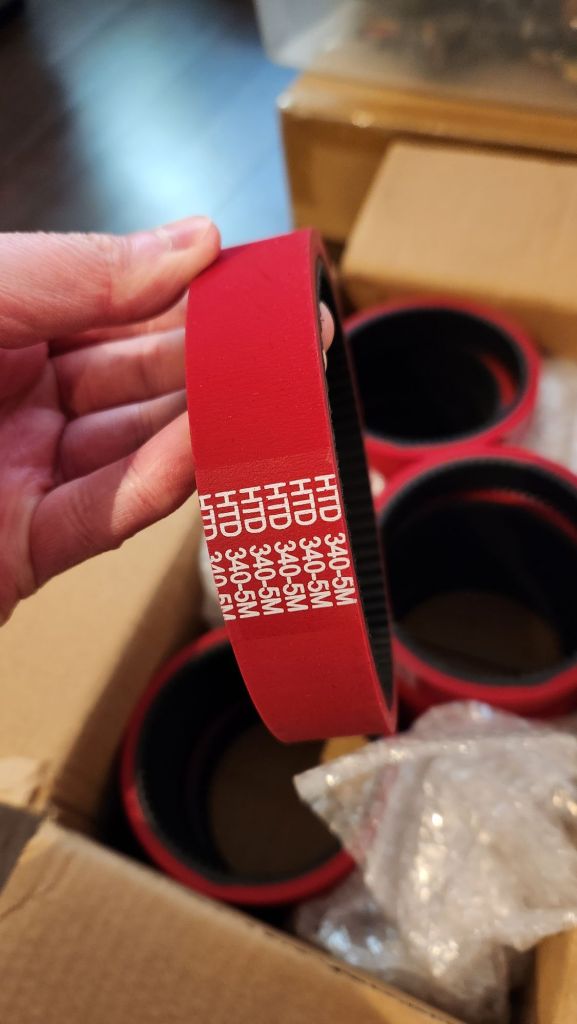
I first bought some samples from AliExpress to become familiar with the materials and specifications. Once I understood the specs, I had a set custom made from Yonghang Belt Co. in China. 5M, 340 teeth, 25mm width with a thick 6mm LINATEX rubber coat.
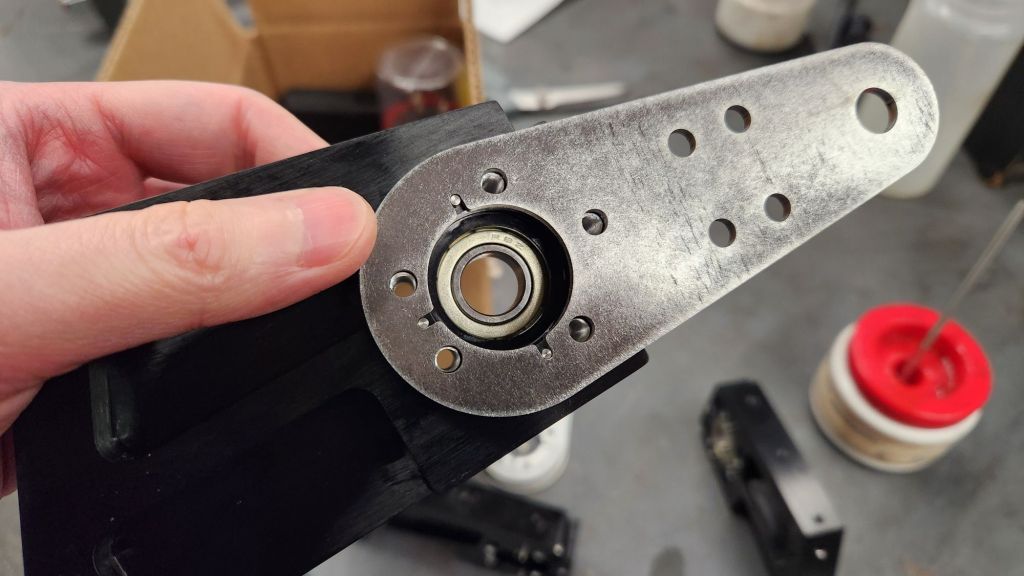
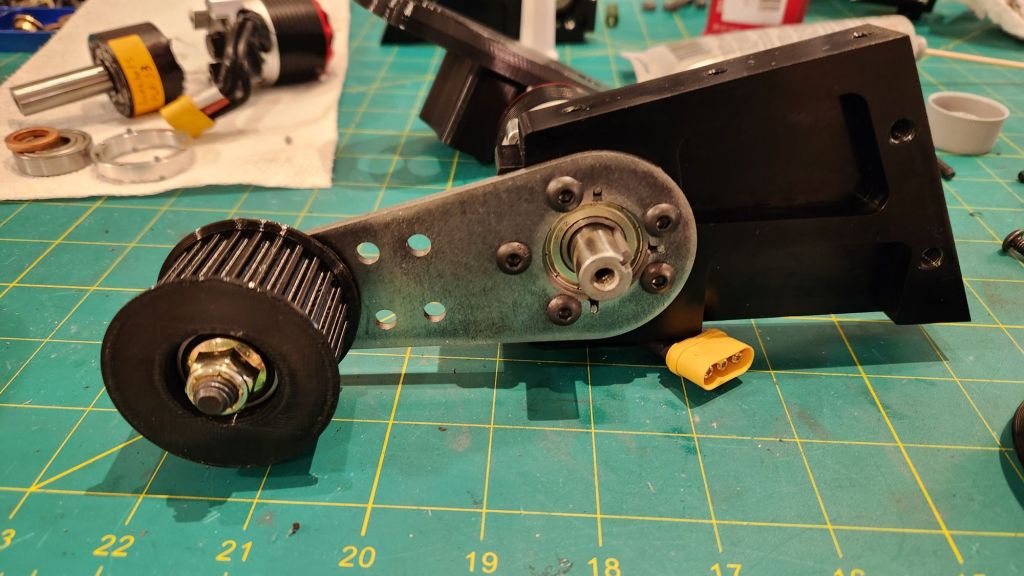

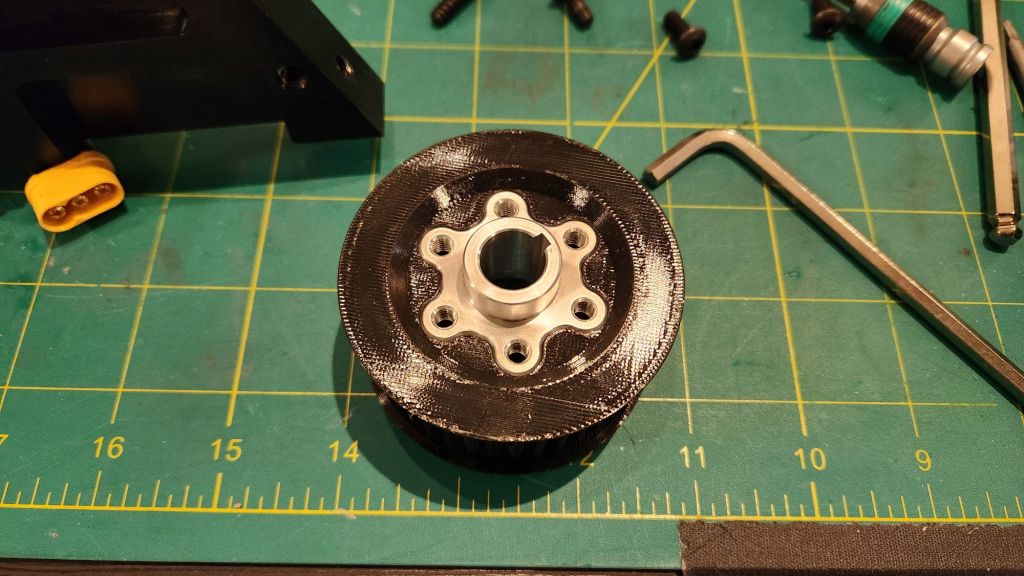
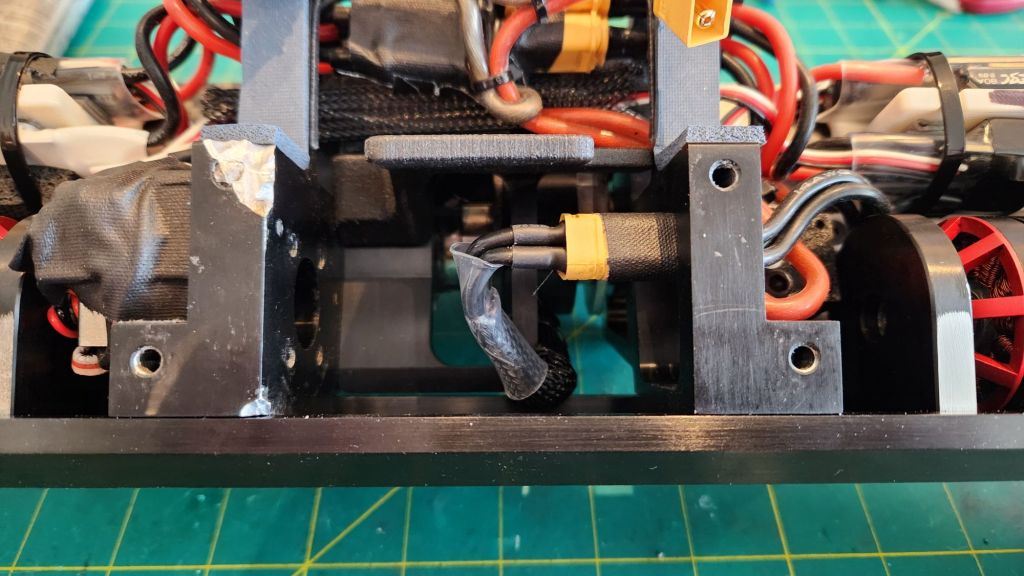
In the interest of time, I made plans to retrofit the existing chassis for treads. I match drilled the side billet to accept a 3mm AR500 plate which would mount the idler pulley. The idler pulley is printed TPU mounted on a single cantilever shoulder bolt; a bearing/spacer/belleville stackup ensures the bolt is rigid and perpendicular to the plate face. The main pulley is driven by an aluminum hub I outsourced to LT Century Prototype which should help better distribute torque from the output shaft keyway. I sized the main pulley, also printed TPU, such that its diameter with a belt was equivalent to the existing wheel.


As soon as it was ready, I let Aaron give it a test drive. As hard as we tried, we couldn’t drive hard enough to derail the tracks… which is great!

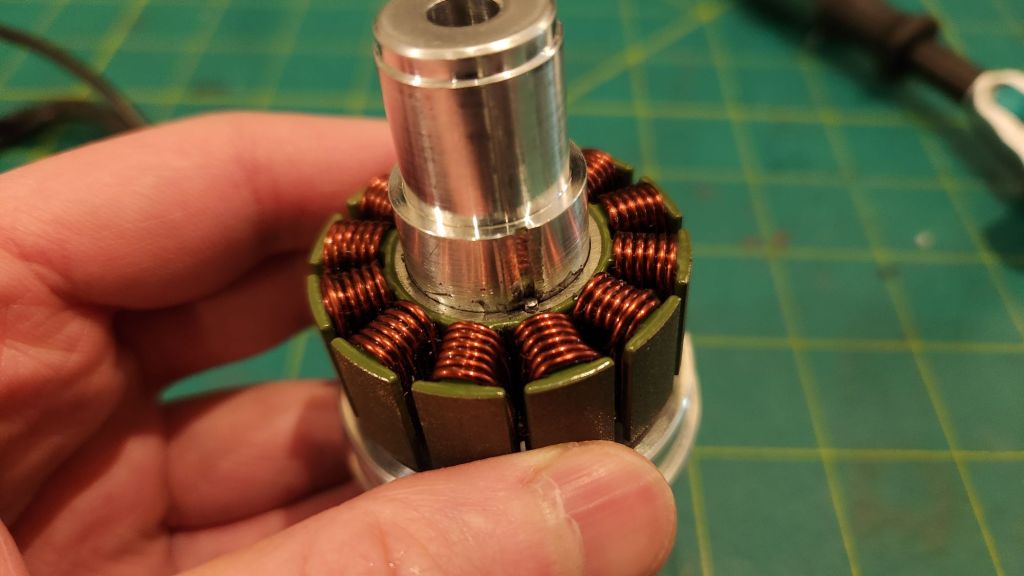
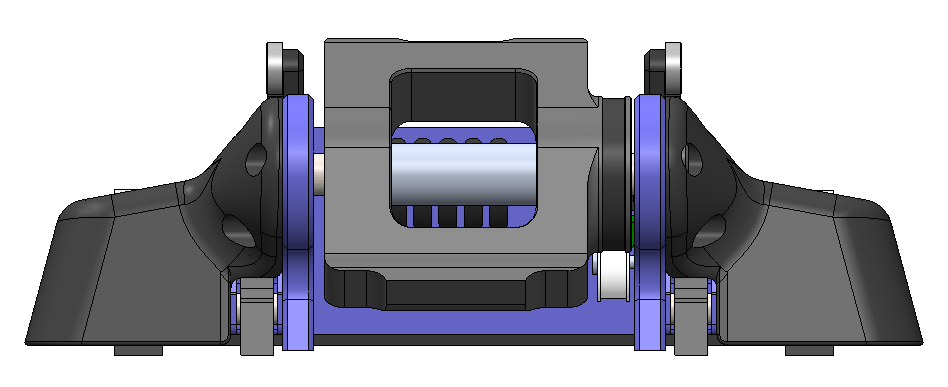
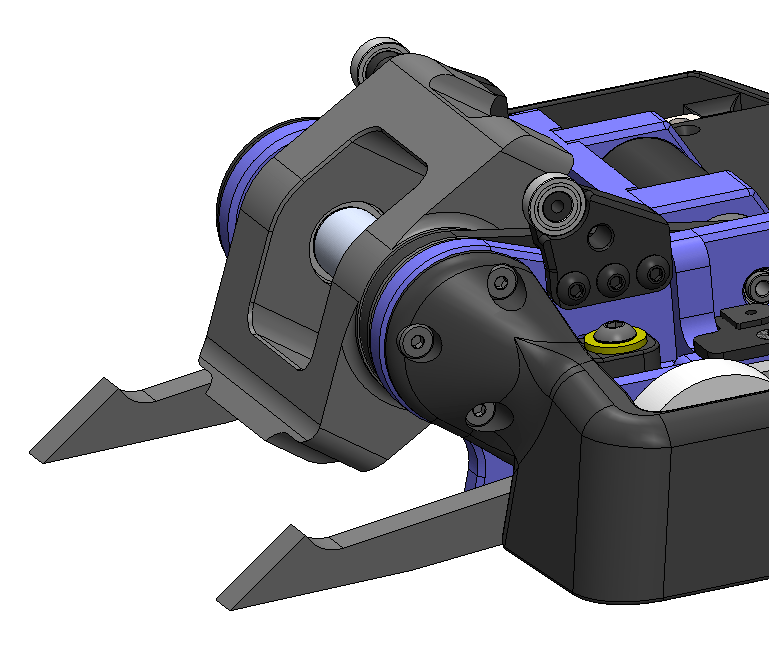
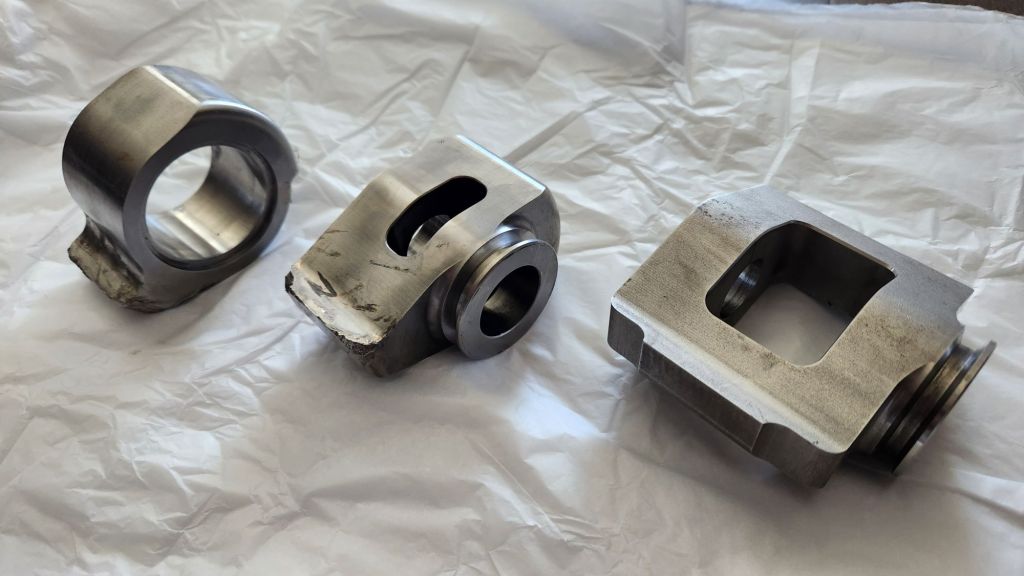
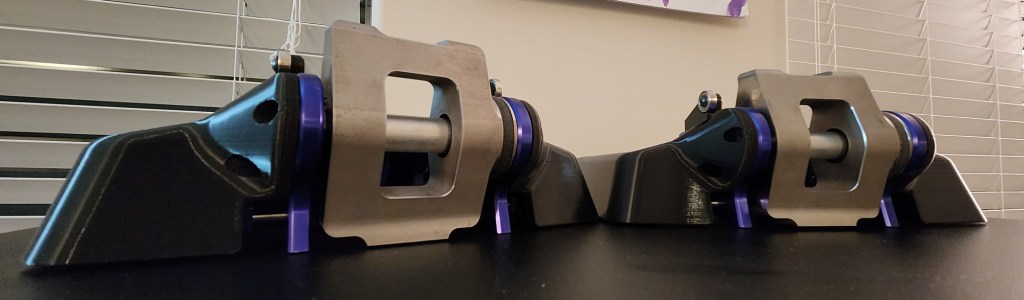
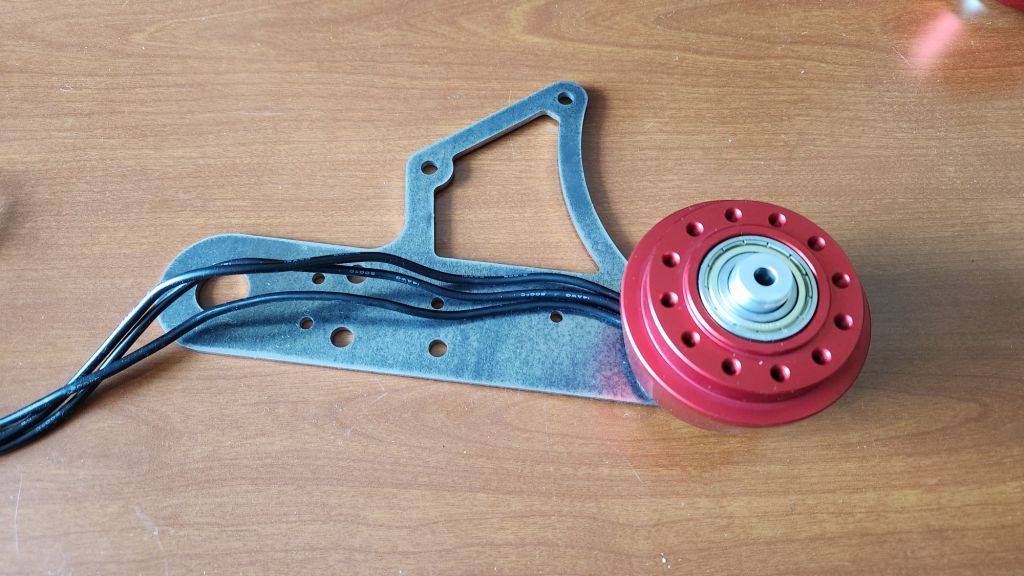
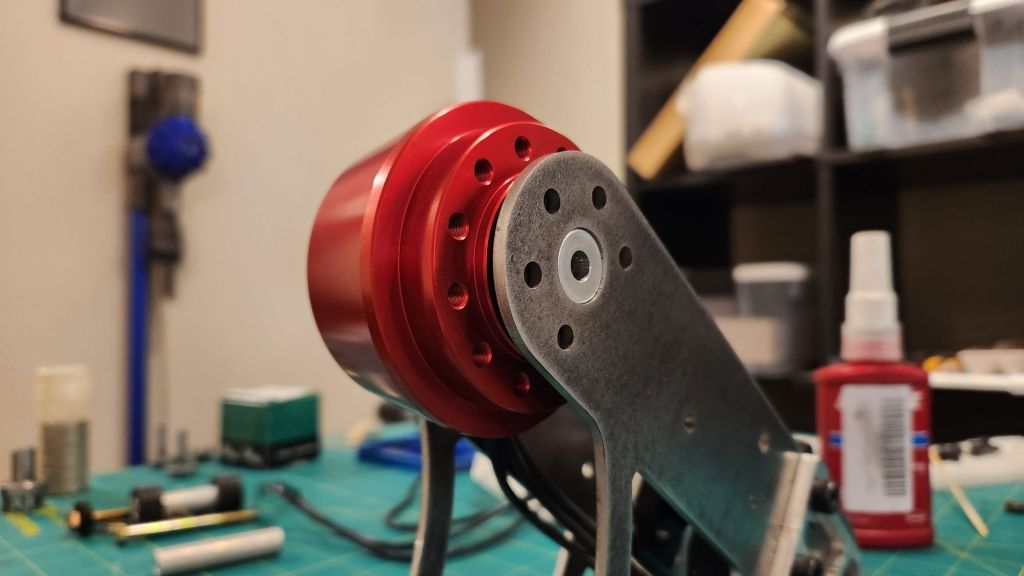
For the prototype, I also designed the hubmotor around existing sizes and geometries. The arm plate internal width was set by the clutch billet at the base of the arm and I would be reusing the 10mm thick blades from last year. The biggest challenge was finding an appropriately sized motor with a large enough ID. By recommendation of Derek, I stumbled upon the Brotherhobby T7 series motors which promised a 20mm ID stator, larger than other motors in the 45mm class. More beautiful parts made by LT Century. This time I included the key groove so I wouldn’t have to carve one myself!

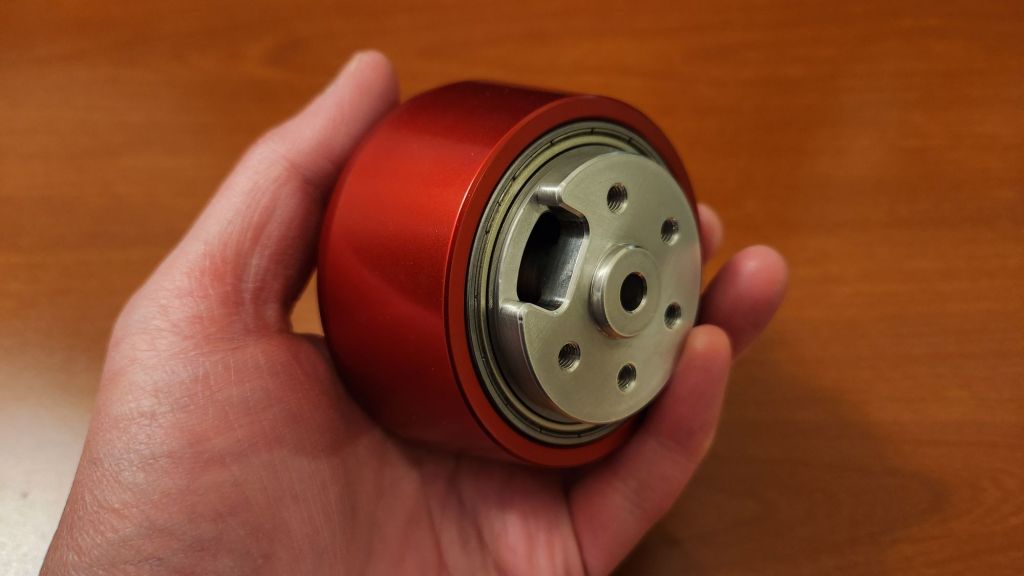
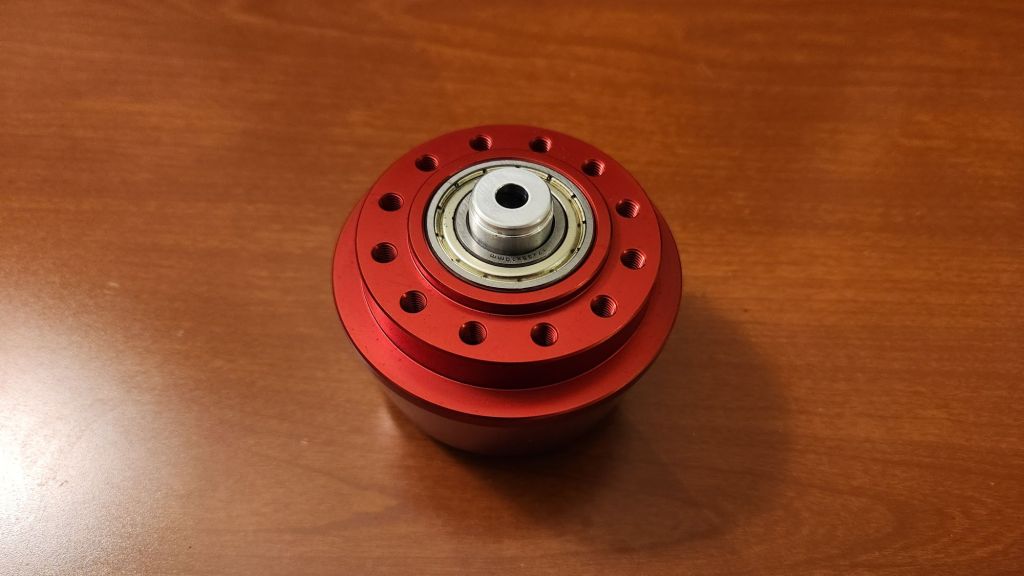
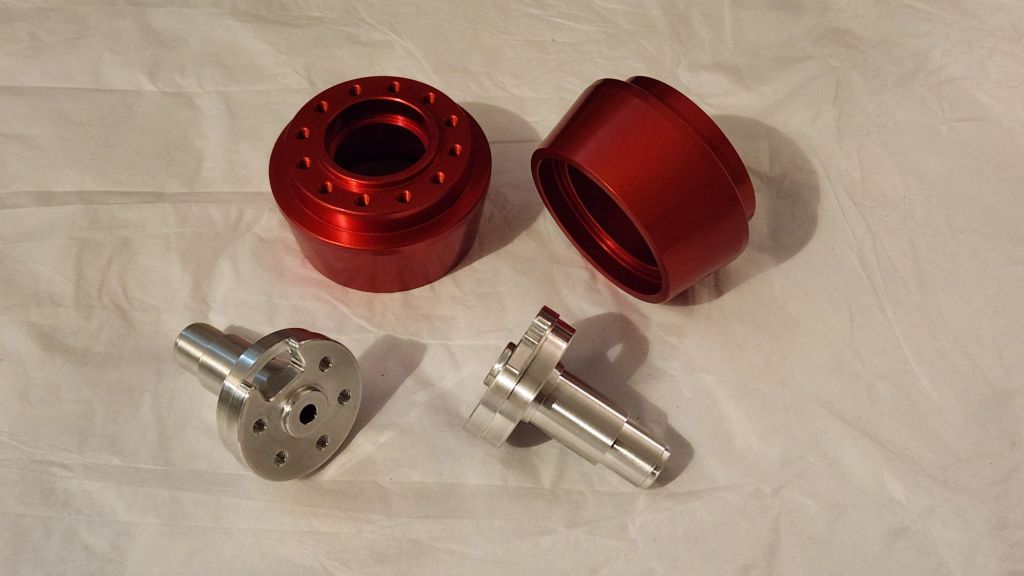
This unit I designed in my classic two-bearing, two-piece design I use for all my other hubmotors. A main stator mount that houses a large ring bearing and a rotor which houses the magnets, flux ring, and small bearing. The idea is pushing the complexity into a few parts and guaranteeing the relationship of critical components machining tolerances rather than assembly nuances. Two small pilot features locate the position on each arm plate and feature a step-down shelf to control the spacing. A large belleville washer goes between the arm plate and the small bearing to preload the stack and take up space. A long bolt goes through the center of it all to compress the assembly together.

The Rhino80 AM32 ESCS ended up being a dream for the hubmotor giving MegatRON spicy starts even for direct drive.
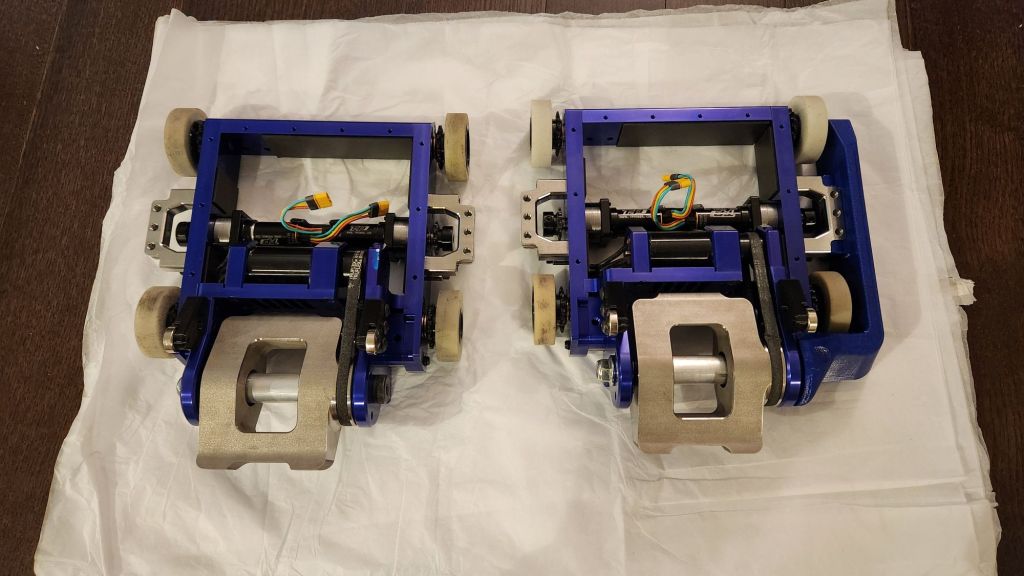
In the final week before the competition, MegatRON is now also ready to rock! I left the spare robot in the belted configuration to save on replacement time in case the hubmotor failed during competition bot both robots were running treads. One surprising detail is that the hubmotor robot was 11 oz lighter. I wonder what that could be used for?…

Stay tuned for the next blog post: the event report for NHRL’s April 20th competition featuring Silent X, Saiko!, and MegatRON!
